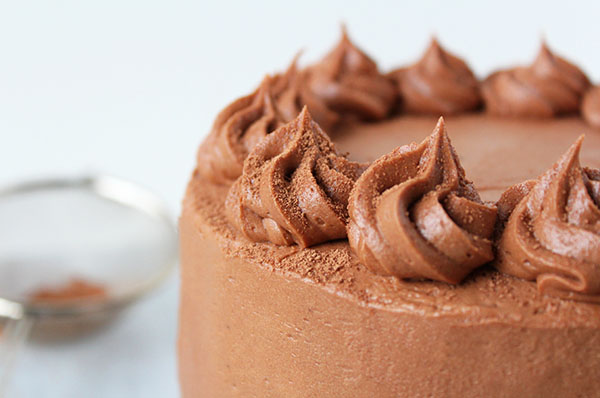
When I think Valentine’s Day, I automatically think chocolate. With Valentine’s Day around the corner, I thought it would be the perfect time to post something decadent and chocolatey. You cannot beat a classic Chocolate Cake.

This cake is chocolatey, soft, and super moist, probably one of the moistest cakes I’ve ever tasted… okay, last time…. moist. It is perfectly balanced by the richness of the fluffy chocolate buttercream. This cake is perfect for any occasion, not just Valentine’s but birthdays, holidays, or even dinner parties!
As you’ve probably guessed, I’m a simple girl that likes her food and chocolate cake. This is probably my favorite chocolate cake recipe out there. Its super soft and spongey which makes it a little more challenging to work with but it is completely worth it! This recipe was lightly adapted from the original which can be found here. The buttercream icing recipe was also ever so slightly adapted from the original which can be found here.

A little back story on a few challenges I had with this project. As you know, I live with two boys, my husband and his brother. It’s kind of a bachelor pad with just the essentials. When icing cakes, putting the cake on a lazy susan or cake turntable helps tremendously in turning the cake to even out the frosting on the sides. It wasn’t until after my cakes were baked that I realized I didn’t have a turntable…. how the heck am I going to evenly frost this cake… I guess I could just turn it on the table… but it’s so much easier with a lazy susan. So I looked around to find anything that might make turning a cake easier. Here is the solution I came up with: giant round takeout lid for the base, smaller takeout lid inside with rim of small round balls (those are actually airsoft pellets… boys and their toys right?)
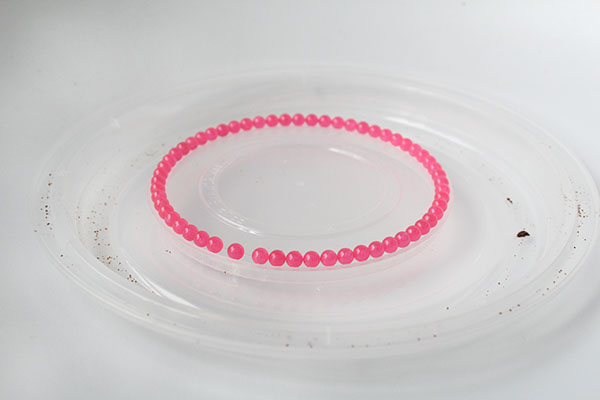
topped with a cork coaster…. and voila!

Not a bad substitution for a lazy susan. It wasn’t perfect but it was definitely better than nothing at all!
Classic Chocolate Cake
Chocolate Cake
- 3/4 cup and 2 tablespoons all-purpose flour
- 1 cup white sugar minus 2 tbsp
- 1/4 cup and 2 tablespoons unsweetened cocoa powder
- 1 teaspoon baking soda
- 1/2 teaspoon baking powder
- 1/2 teaspoon salt
- 1 egg
- 1/2 cup strong brewed coffee
- 1/2 cup soymilk + 1/2 tbsp vinegar ( or buttermilk)
- 1/4 cup vegetable oil
- 1/2 teaspoon vanilla extract
- Preheat oven to 350 degrees F (175 degrees C). Grease two 5-inch round cake pans and dust cocoa over to cover the entire pan (to prevent your cakes from having white streaks after)
- In a large bowl, sift together flour, sugar, cocoa, baking soda, baking powder and salt. Make a well in the center.
- Combine egg, coffee, buttermilk or substitute, oil and vanilla in a liquid measure. Slowly add into dry ingredients and beat for 2 minutes on medium speed. Consistency will be very runny. Evenly distribute into prepared pans.
- Bake at 350 degrees F for 35 to 40 minutes or until a toothpick inserted into the center comes out clean.
- Cool for 10 minutes, then carefully remove cakes from pans and cool for another 10 minutes.
- Carefully saran wrap each cake and place into the freezer for 1 hour – 1.5 hours (don’t pull the saran wrap too tightly around the cake, since the cakes are so soft, they will easily deform/ squish)
- Meanwhile, make the buttercream
Chocolate Buttercream
- 1 cup unsalted butter, room temperature
- 3 1/2 cups icing sugar
- 1/2 cup unsweetened cocoa powder
- 1/2 tsp salt
- 2 tsp vanilla
- 3 tbsp soy milk (or regular milk)
- In a large bowl, beat the butter for a few minutes on medium speed, until fluffy.
- Add in the icing sugar, cocoa powder, salt, vanilla and soy milk. Beat on high for 4 minutes, scraping down the sides occasionally. If the icing is too thick, add a little more milk. Alternatively if it is too thin, add in a little more icing sugar.
- Saran wrap and set aside.
Assembly
- 2 oz Dark chocolate, finely chopped
- 1 tbsp cocoa powder
Remove cakes from freezer. With a serrated knife, cut both cakes in half.
Place a small amount of buttercream icing onto a prepared cakeboard and place the first layer of cake onto the board – the buttercream will act like glue to keep the cake from sliding off the board. Frost an even layer of buttercream and repeat until you have all four cake layers stacked. Gently squish all layers down and have a look to make sure the sides/ top are even. You may need to trim or squish down the cake to make it completely even.
Crumb coat: you’ll want to lock in all the crumbs so that you don’t see them on your final exterior icing. Spread a very thin layer of icing all over the cake to seal in the crumbs. Refrigerate for 15 minutes to set the buttercream.

Icing: evenly distribute a 1/2″ layer of icing around the sides and top of the cake using an off-set spatula (seems like a lot but a lot of it will be scrapped off) Holding a bench-scraper at 90 degrees to the cake, carefully turn the cake while maintaining steady pressure as you smooth/ remove icing. Repeat until done. Using an offset spatula, scrape an excess from the top of the cake, moving the spatula from the perimeter to the center.

Carefully pick your iced cake up. Holding the cake in one hand, use your other free hand to pick up the chopped chocolate and press the chocolate to the bottom of the cake.
If you have any leftover icing, you can pipe rosettes on top of the cake with a 1M piping tip. Dust with cocoa powder and voila!
Wishing you all an early Happy Valentine’s Day!

And remember, it’s truly about the thought that really counts!

This cake looks amazing! I could eat it right now! :)
LikeLike
Thank you! A slice of cake is good any time of the day !
LikeLiked by 1 person
beautifully done!
LikeLike
Thank you so much 😊
LikeLiked by 1 person
Looks amazing!
LikeLike
Thank you!
LikeLike